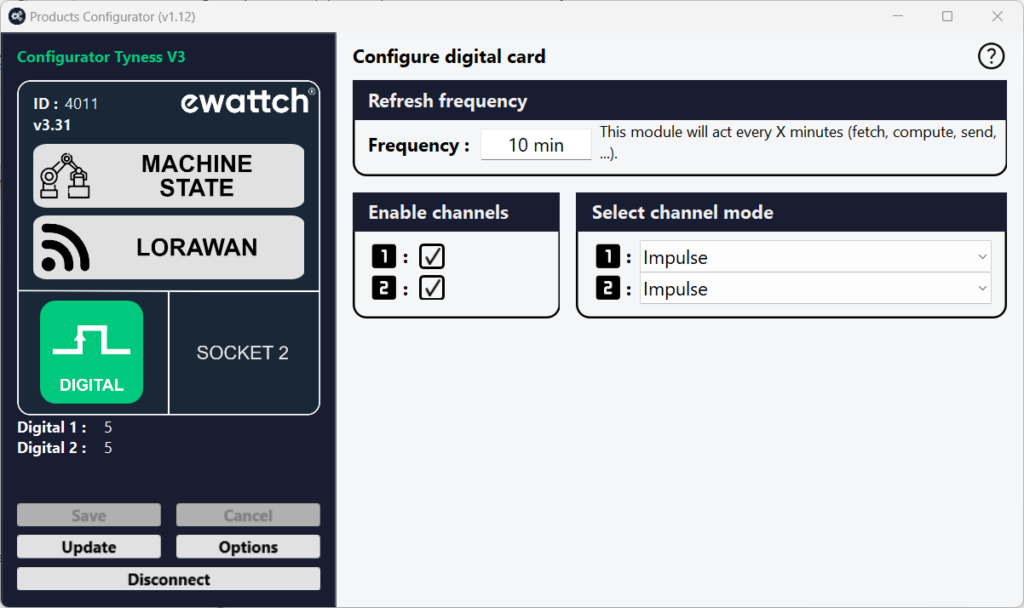
Card settings
 The board is configured with the Configurator software
Always use the latest version of the Configurator and check that your Tyness has
the latest version of the firmware. If necessary, carry out an update.
1 – Click on “Config” of the pulse board
2 – In the insert “Enabled channels”, define which inputs will be active.
To do so: click on 1 and/or 2.
3 – Define the sending period of the readings: insert “Frequency”
4 – Define the functioning mode of each input: insert “Select channel mode”
Impulse: returns the index of the number of pulses counted from start-up of
the product.
Input : returns the status of the input at the time of sending of the frame
(voltage detected or not)
Time count : returns the period during which the voltage was detected on the
input from the start-up of the product.
5 – Once all the values are entered, validate by clicking on “Save”
If the operation is successful, a window displays “operation successful”.
Validate by clicking on OK.
Your board is ready to operate.
