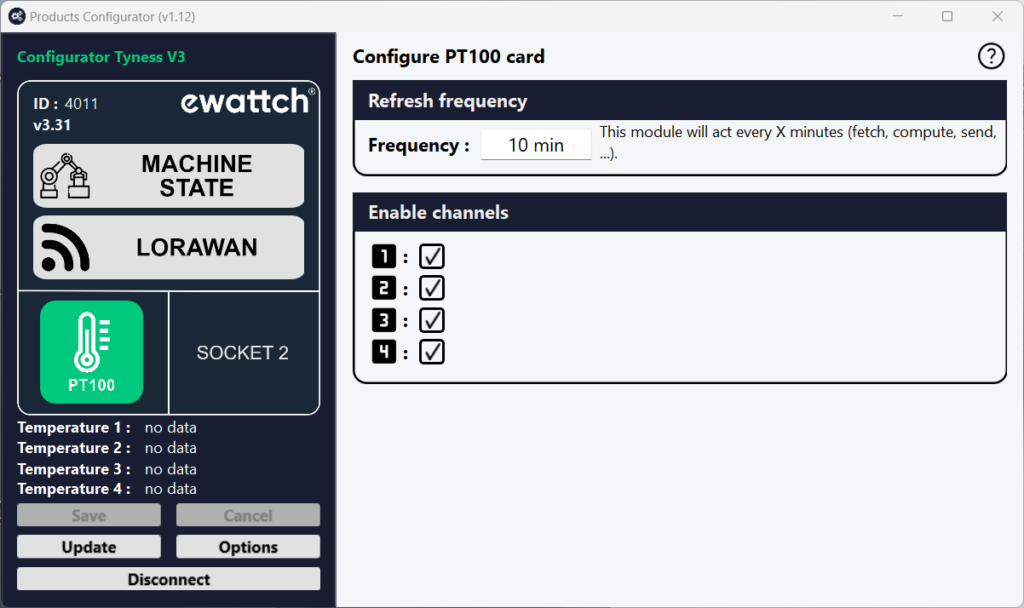
Settings
The board is configured with the Configurator software.
Always use the latest version of the Configurator and check that your Tyness has the latest version of the firmware. If necessary, carry out an update.
Configuration steps
1 – Click on “Config” of the board
2 – In the insert “Enabled channels”, define which inputs will be active.
To do so, select:
“1” and/or “2” and/or “3” and/or “4”
3 – Define the period of sending of the readings: “Frequency”
4 – Once all the values are entered, validate by clicking on “Save” on the left menu. If the operation is successful, a window displays “operation successful”.
Validate by clicking on OK
Your board is ready to operate.
Verification of the readings
You can check readed values on the left menu when you select PT100 board.
