Setting up the board
The board is set up using the Configurator software.
Always use the latest version of Configurator and check that your Tyness
has the latest firmware version. Update if necessary.
1 – Click on “Config” on the pulse card
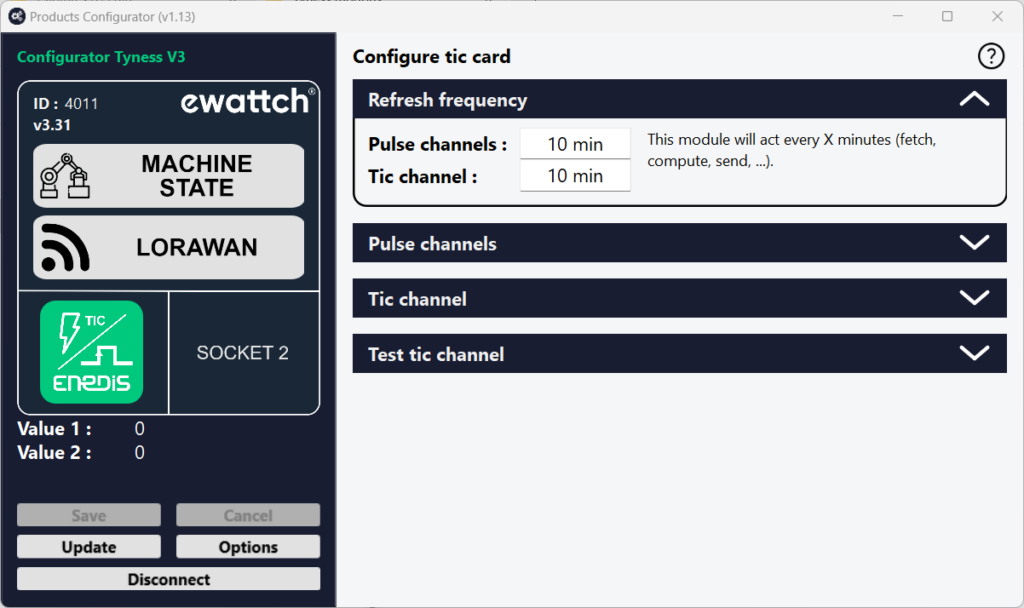
2 – In the “Refresh frequency” box, define the data transmission period.
- If a digital input is configured for “Impulse and cycle capture” (cycle time measurement), select the number of rising edges per cycle..

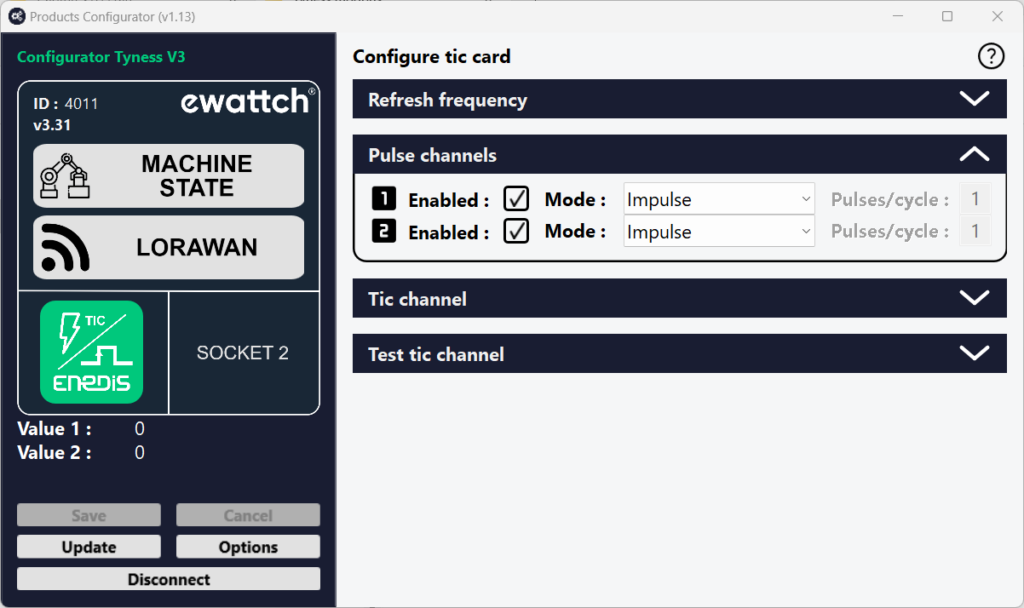
3 – In the “Pulse channels” insert, define which pulse inputs will be active.
To do so, click on 1 and/or 2
- Define the operating mode for each input: “Mode” insert
Impulse: returns the index of the number of pulses counted since product start-up.
product.
Input: returns the state of the input at the time the frame is sent (voltage detected
or not)
Time count: returns the duration during which voltage has been detected on the input
since product start-up.
Impulse and cycle capture: returns the index of the number of pulses counted since the product was
as well as the time since the previous pulse. The “pulse per capture cycle” option lets you measure the time since a larger number of pulses.

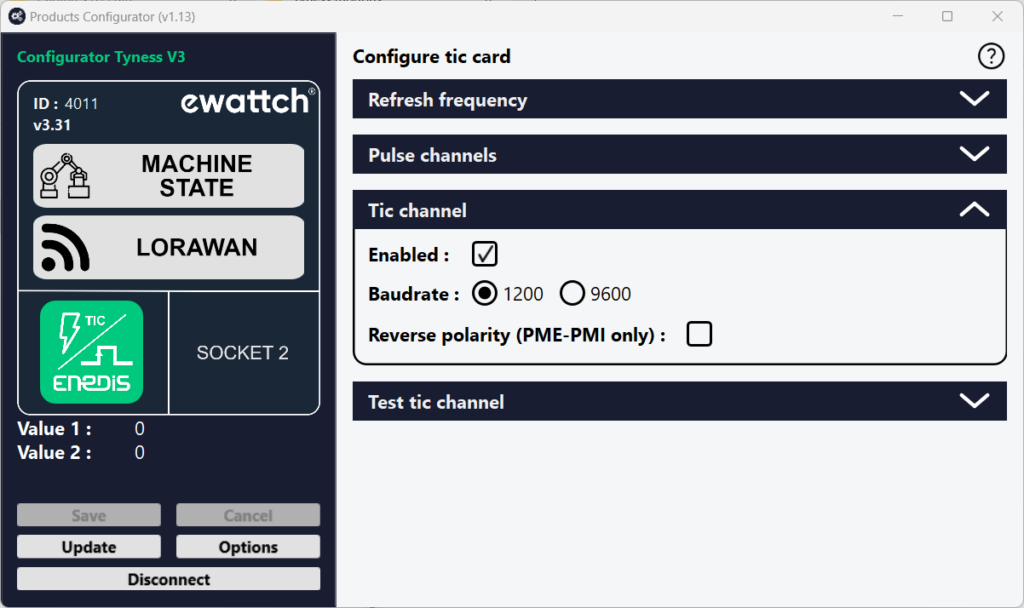
4 – “Tic channel” insert
- Baudrate selects the speed of the teletransmission link.
- The “Reverse polarity” tick allows you to reverse the polarity of the tele-information link. This tick is only useful for SME-SMI meters.

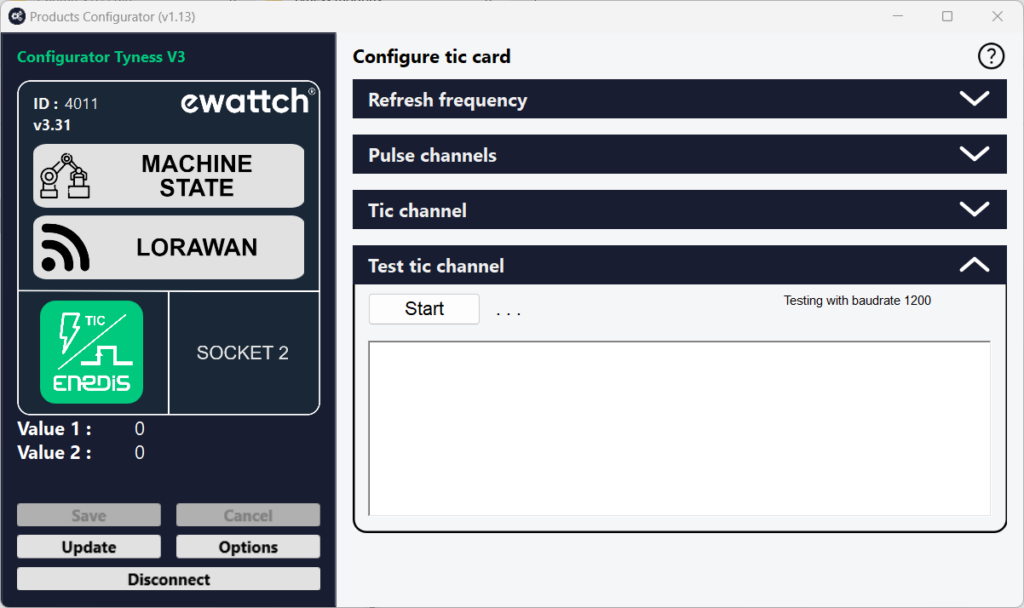
5 – The “Test tic channel” section checks that communication with the counter is correctly established. See the “Tic debug” section of this documentation.

6 – Once all values have been entered, validate by clicking on “Save”.
If the operation was successful, a window displays “operation successfull”. Confirm by clicking on OK.
Your card is now ready for use.
