
LoRa Extension
Overview
The RAK WisGate Edge Lite 2 complements your Ewattch solution by acting as a packet forwarder to extend the LoRaWAN coverage of an Ewattch Multitech gateway.
Prerequisites
Requirements for extending a LoRaWAN network
- Ewattch gateway: static IP or DHCP with reserved IP and known address. Ethernet network
- RAK Edge Lite 2 connected to the same Ethernet network as the Ewattch gateway
- Open ports 80, 123, 443, 1780 and 1782 on the network for the RAK
- NTP server available on the local network
Communication Diagram

Configuration Procedure
Network Identification
After powering on the RAK Edge Lite 2, a Wi-Fi hotspot network is automatically created. The network name follows this format:
Name format: EWATTCH_RAK_ABAB
- ABAB represents the last four characters of the device MAC address
- Example:
EWATTCH_RAK_1A2B
Connecting to the Hotspot
- Search for the corresponding Wi-Fi network in the list of available networks
- Connect to the network (no password required by default)
- Wait until the connection is established
2. Initial Configuration
Accessing the Web Interface
- Open a web browser
- Enter the address:
http://192.168.230.1 - Press Enter to access the interface
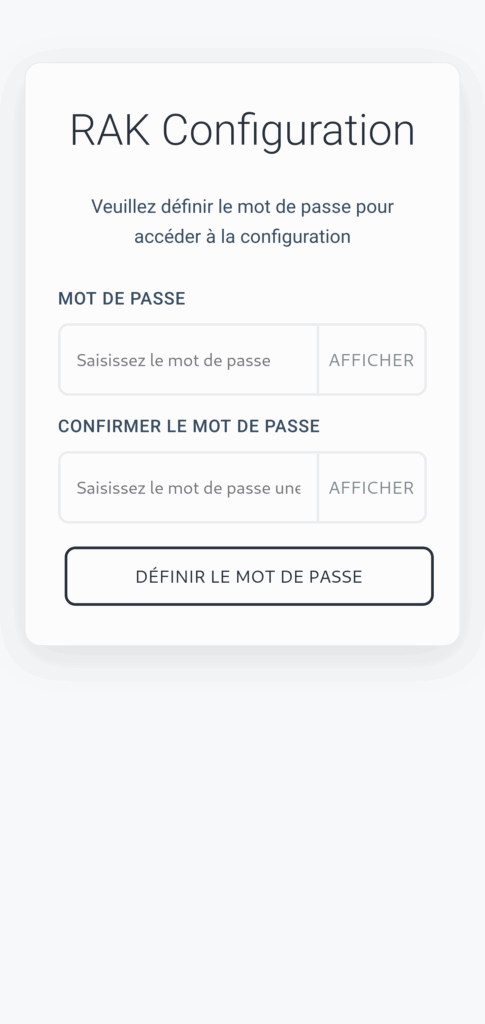
Administrator Password Configuration
During the first login, the system requires the creation of a secure administrator password.
Required criteria:
- Minimum length: 12 characters
- Uppercase letter: At least one uppercase letter (A-Z)
- Special character: At least one symbol (!@#$%^&*)
- Number: At least one digit (0-9)
Example of a valid password: MyPassword123!
3. User Interface
Home Page
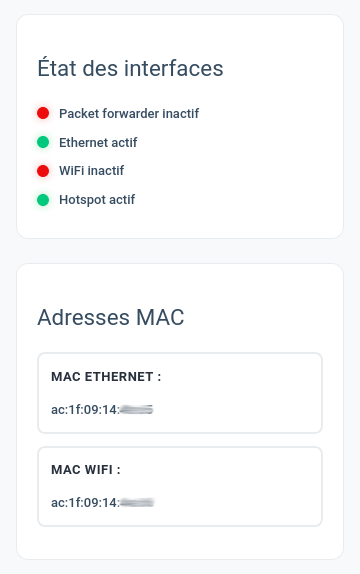
The home page provides an overview of the system:
Displayed information:
- Service status: Real-time status (active/inactive) of each system service
- MAC addresses:
- Wi-Fi interface MAC address
- Ethernet interface MAC address
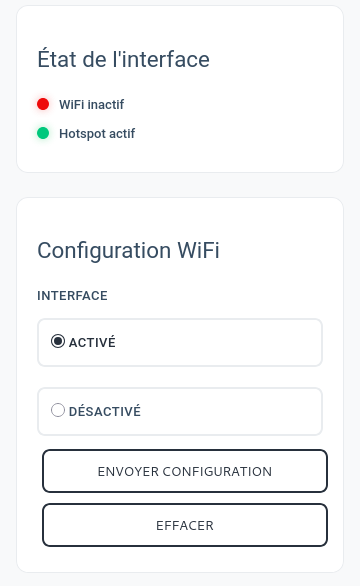
 Wi-Fi Page – Wireless Connection Management
Connecting to an Existing Wi-Fi Network
WARNING: Only 2.4 GHz Wi-Fi networks are supported by the RAK.
Configuration process:
- Activation: Enable Wi-Fi client mode, click Enable, then SEND CONFIGURATION
- The RAK automatically restarts
- Network scan: After reboot, scan for available networks
- Connection: Select the desired network and enter the password
- IP configuration: Choose between automatic DHCP or static IP
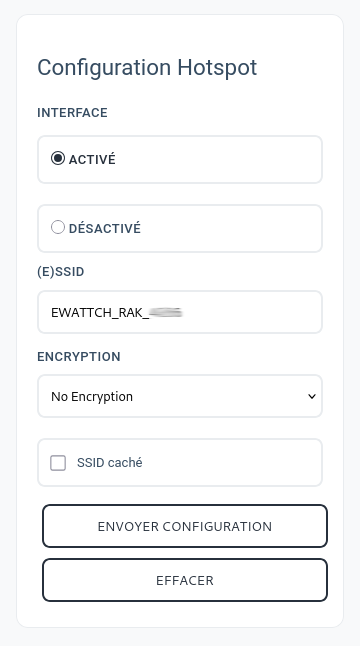
 Wi-Fi Hotspot Configuration
Security recommendations:
- Option 1: Completely disable the hotspot if not used
- Option 2: Enable WPA2 encryption with a strong password
- Option 3: Hide the SSID (non-visible network) + password
Configurable parameters:
- Network name (SSID)
- Security password
- Network visibility
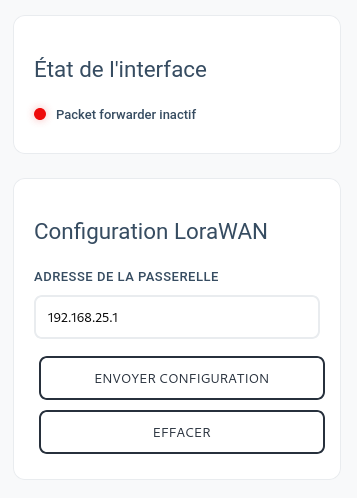
 LoRaWAN Page – Long-range Network Configuration
Server Configuration
Main parameters:
- LoRaWAN server address: LoRa Network Server (LNS) IP
- Default configuration: Address of a SynapseCore integrated in a SynapseCore Box
Status Indicators
Color codes:
- 🟢 Green: Communication established with the server
- 🔴 Red: Connection failure or server unreachable
⚠️ Important limitation: The RAK can establish a TCP connection with the configured IP address but cannot verify whether the remote service is actually a valid LoRaWAN server (LNS).
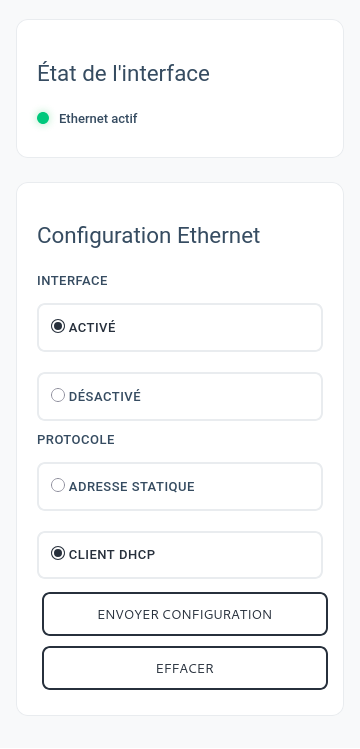
 Ethernet Page – Wired Interface Configuration
Interface Management
Available options:
- Enable/Disable: Enable or disable the Ethernet interface
- IP configuration mode:
- Automatic DHCP: Automatically obtain an IP address
- Static IP: Manual network configuration
 Reset
Reset
To reset the device, press and hold the button on the back for more than 10 seconds.