Tyvisor – Quick start
Objective
This guide will show you how to quickly start a Tyvisor to display your Ewattch dashboards.
Prerequisites
-
Required for start-up
- Installation location with WiFi or Ethernet coverage
- Internet access from Tyvisor
- Socket outlet or USBC 5V power supply close to Tyvisor
- Tyvisor in factory configuration
- Micro HDMI to HDMI cable
- Screen with HDMI connector
Start-up procedure
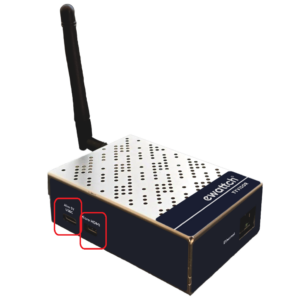
- Connect your micro HDMI-to-HDMI cable to the Tyvisor and to your display.
- Supply the product with 5VDC via the USBC socket on the side of the case.
- Your product will start up when the reset button stops flashing or when the EWATTCH welcome screen appears on your screen. Start-up may take up to 2 minutes.
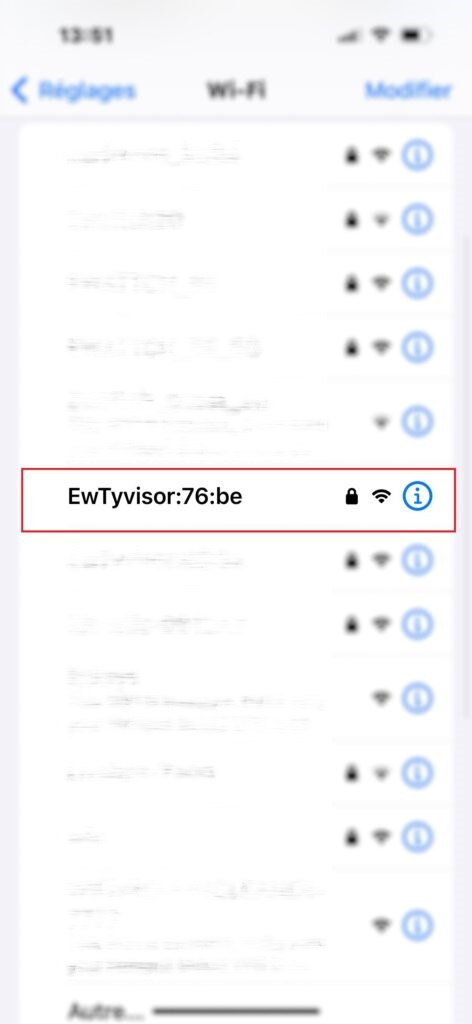
- Connect to the wifi hotspot “EwTyvisor:XX:XX” ending with the last 4 characters of its MAC address (in the example: EwTyvisor:76:be).
- The hotspot password was e-mailed to you when you ordered the Tyvisor.
- WARNING If the hotspot is not visible on the network, perform a product reset procedure:TYVISOR RESET
- Open a browser and connect to http://tyvisor-xxxx.local, xxxx being the last 4 characters of the MAC address(http://tyvisor-76be.local in the example).
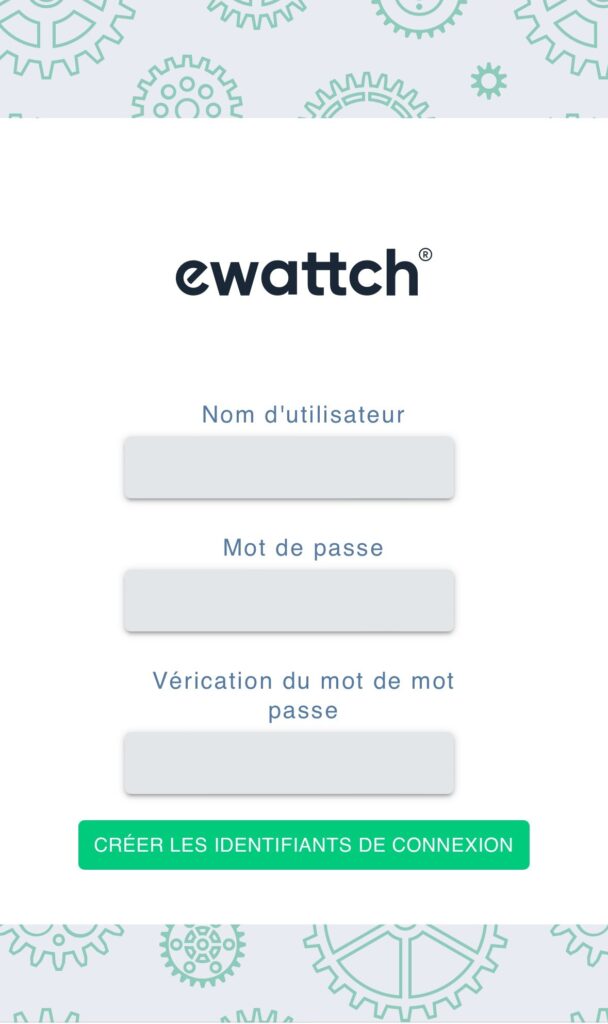
- Set your login and password (if this is your first connection)
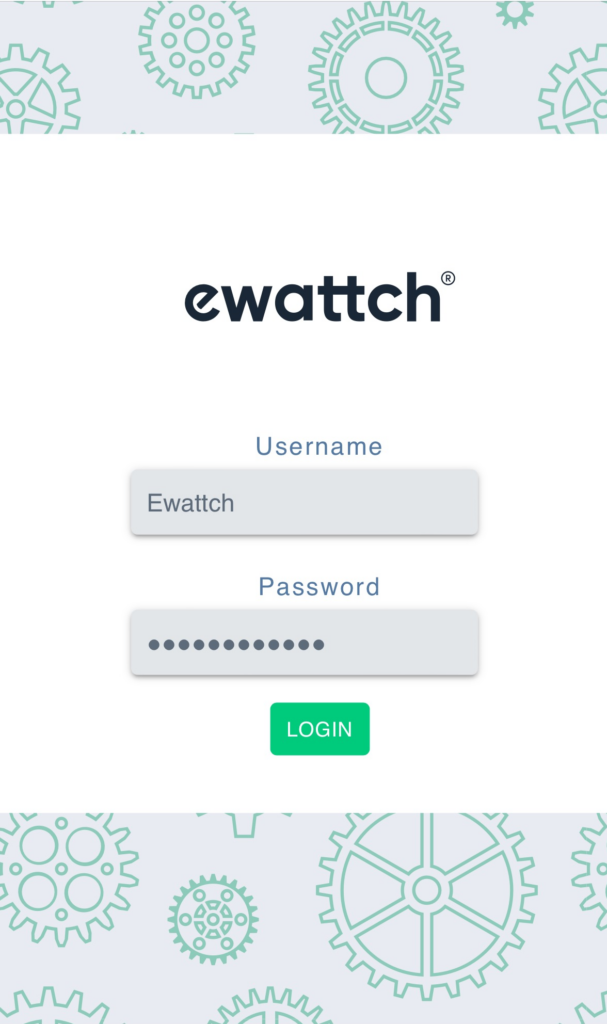
- Identify yourself
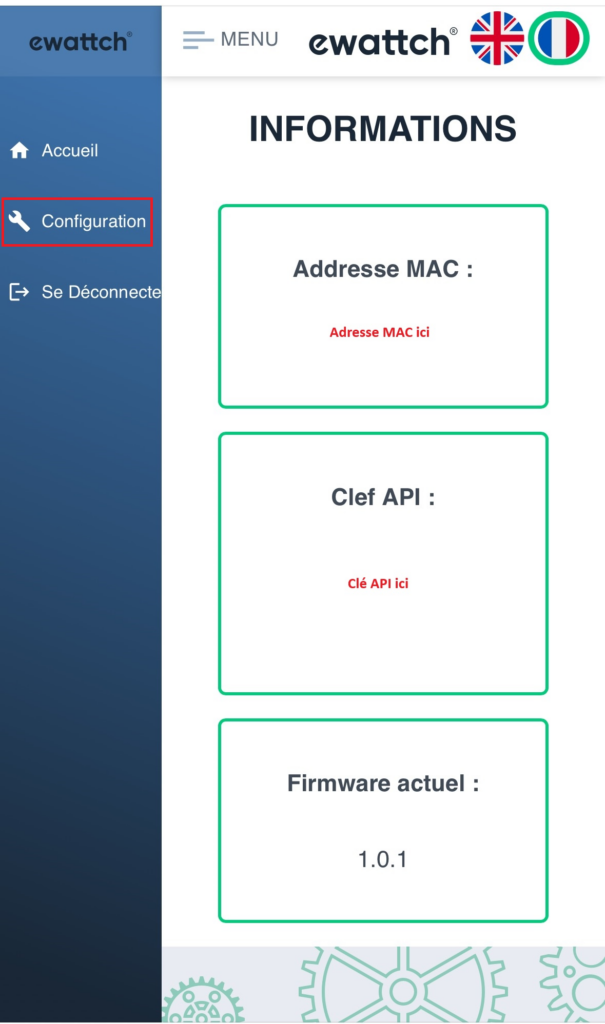
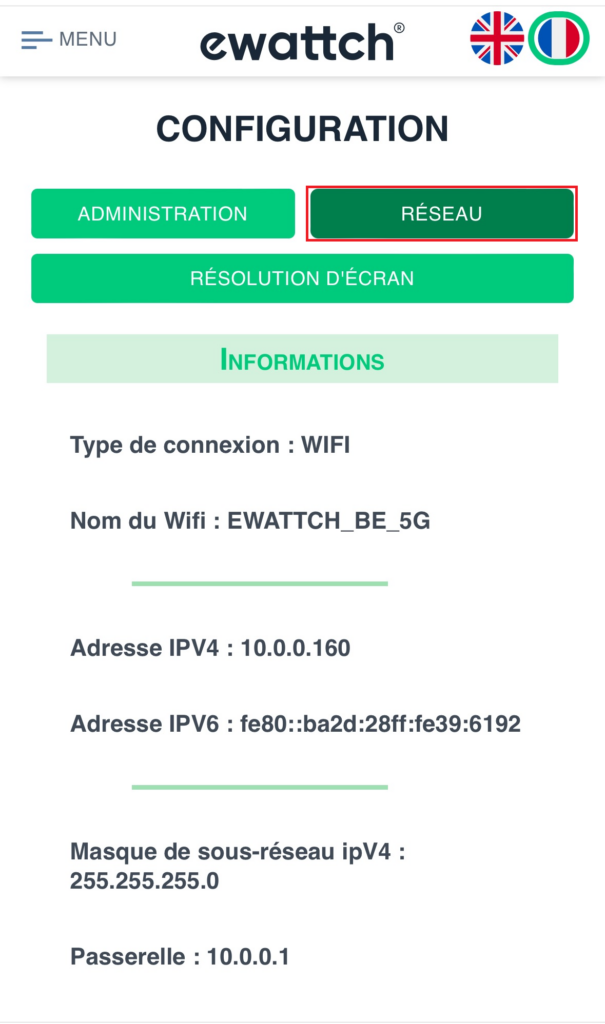
- Go to configuration and enter your wifi configuration parameters (SSID and wifi key) and confirm. The Tyvisor will reboot to take account of the new wifi settings.
- You will be disconnected from the Tyvisor’s wifi hotsport and it will now be accessible at http://tyvisor-xxxx.local, xxxx being the last 4 characters of the MAC address(http://tyvisor-76be.local in the example) or from its IP address (http://10.0.0.160 in the example).
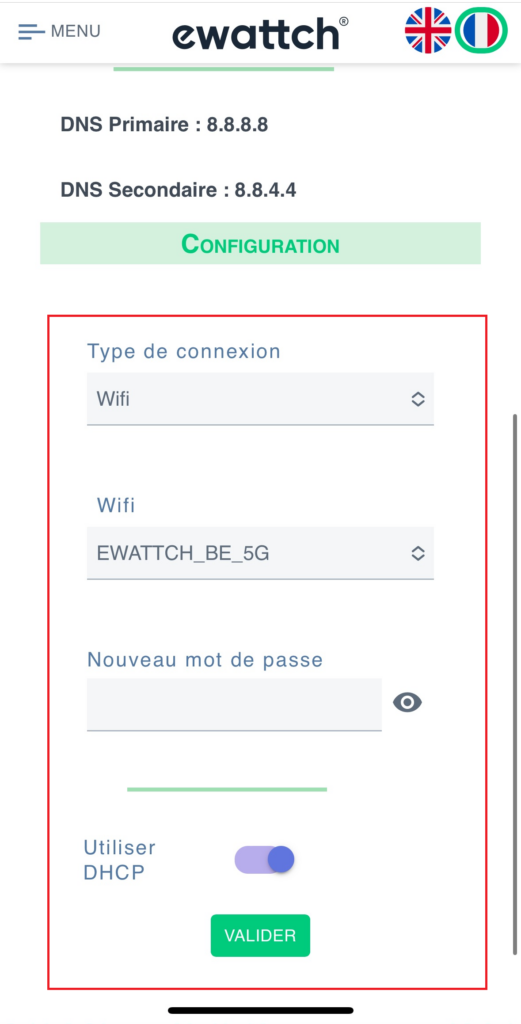
You have DHCP
- Connect your product to RJ45
- Unplug the Tyvisor’s 5V power supply, then plug it back in to restart it.
You don’t have DHCP
- Connect to the wifi hotspot “EwTyvisor:XX:XX” ending with the last 4 characters of its MAC address (in the example: EwTyvisor:76:be).
- The hotspot password was e-mailed to you when you ordered the Tyvisor.
- WARNING If the hotspot is not visible on the network, perform a product reset procedure: RESET TYVISOR

- Once connected, plug your product into the RJ45 socket
- Open a browser and connect to http://tyvisor-xxxx.local, xxxx being the last 4 characters of the MAC address(http://tyvisor-76be.local in the example)
- Set your login and password (if this is your first connection)
- Identify yourself


- Go to configuration and enter your Ethernet network configuration parameters. Don’t forget to confirm. The Tyvisor reboots to take account of the Ethernet settings.
- You will be disconnected from the Tyvisor’s wifi hotsport and it will now be accessible from the local network previously configured on the http://tyvisor-xxxx.local website , xxxx being the last 4 characters of the MAC address(http://tyvisor-76be.local in the example) or from its IP address (http://10.0.0.160 in the example).


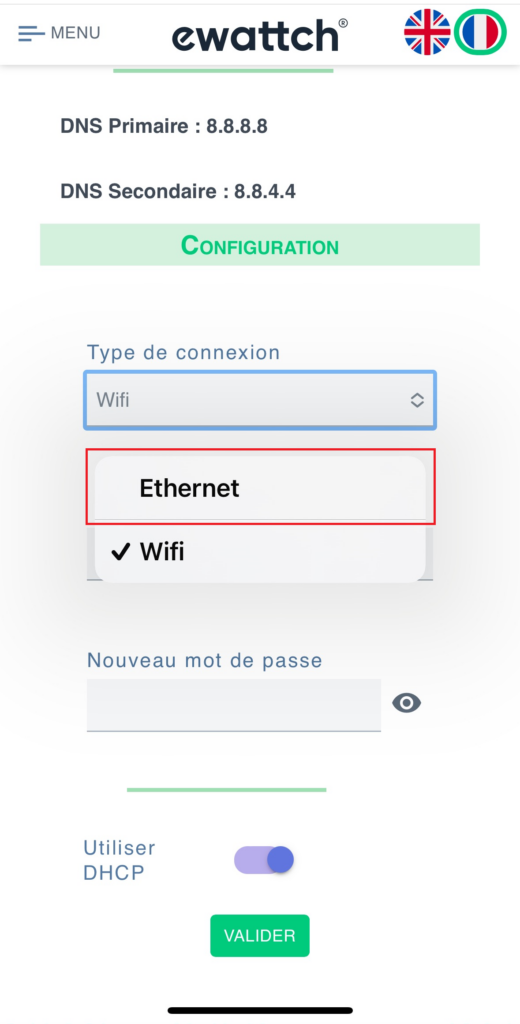
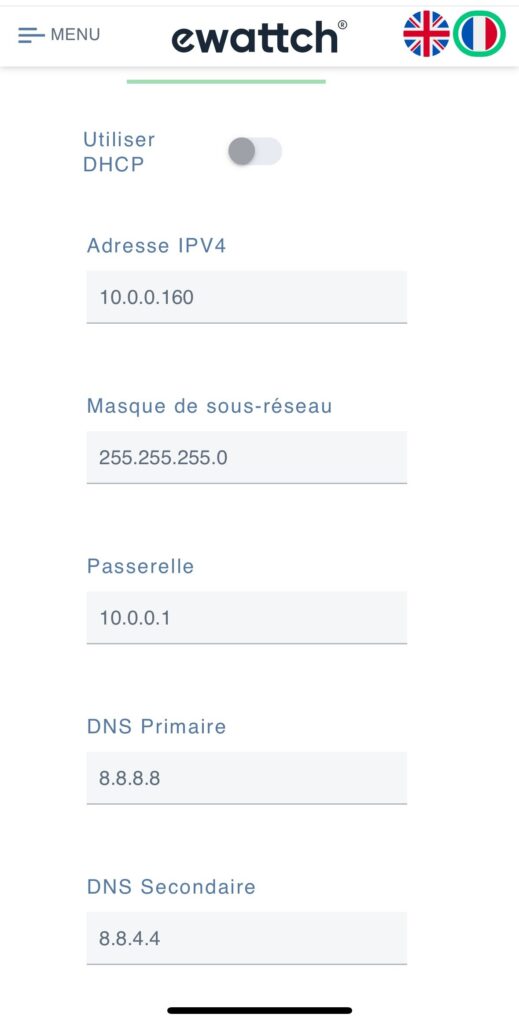
- Connect to the same network as your Tyvisor and enter the address http://tyvisor-xxxx.local, xxxx being the last 4 characters of the MAC address(http://tyvisor-76be.local in the example) or its IP address (http://10.0.0.160 in the example).
- Identify yourself and retrieve theMAC address and API key

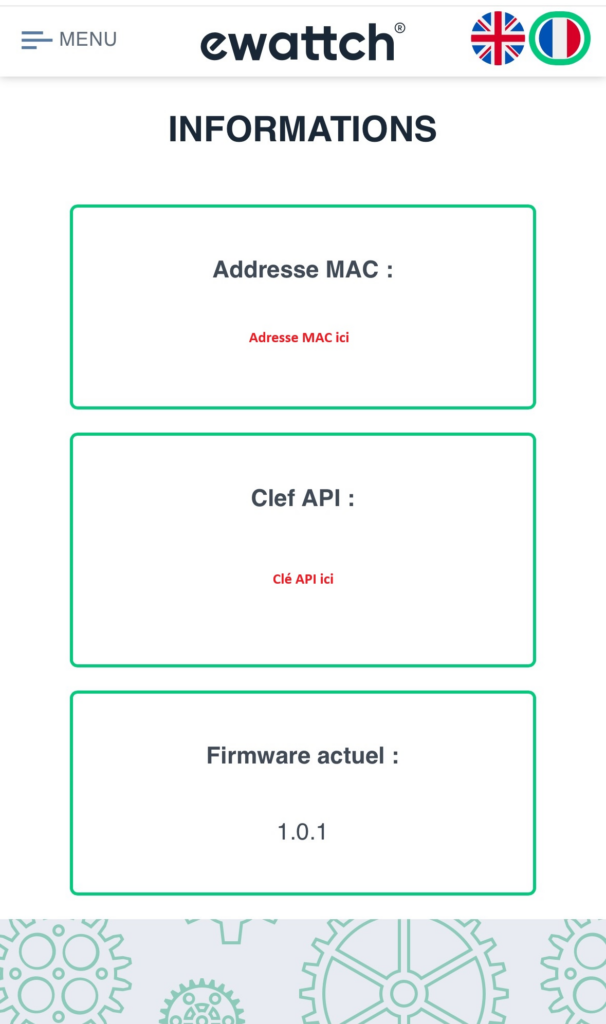
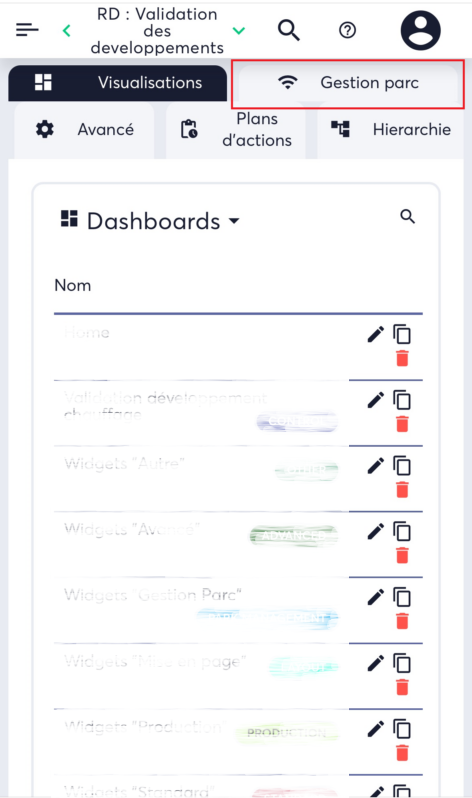
- Log on to your account at https://ewattch.cloud
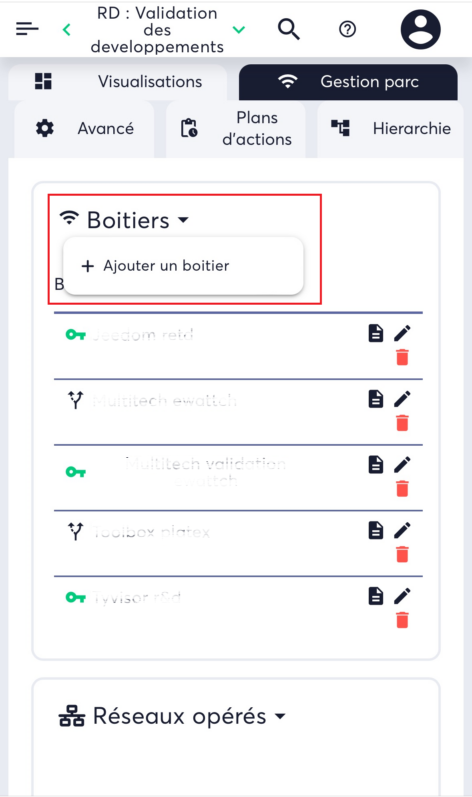
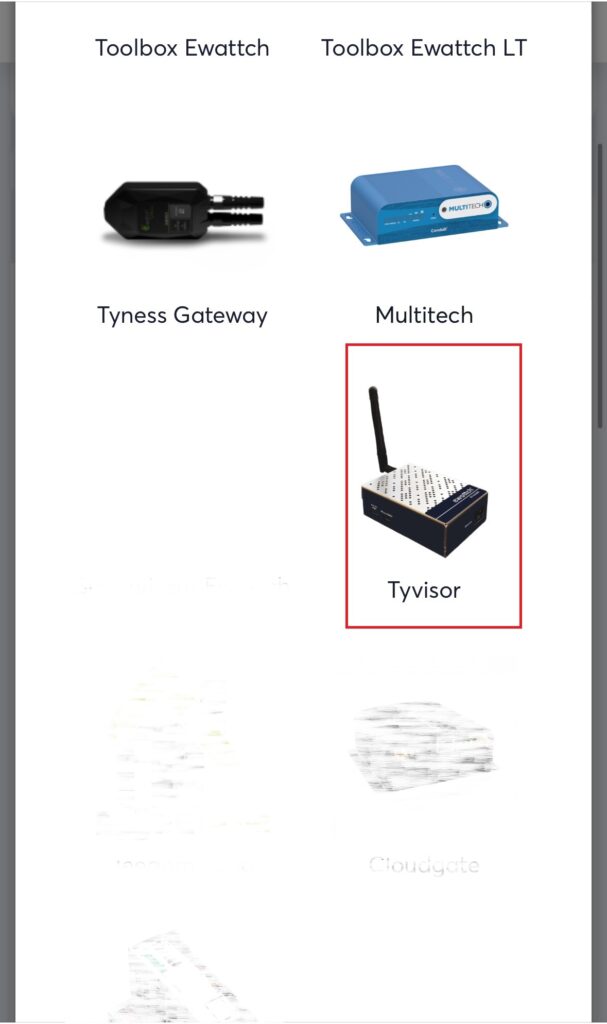
- From your structure in Fleet management, add a Tyvisor type box
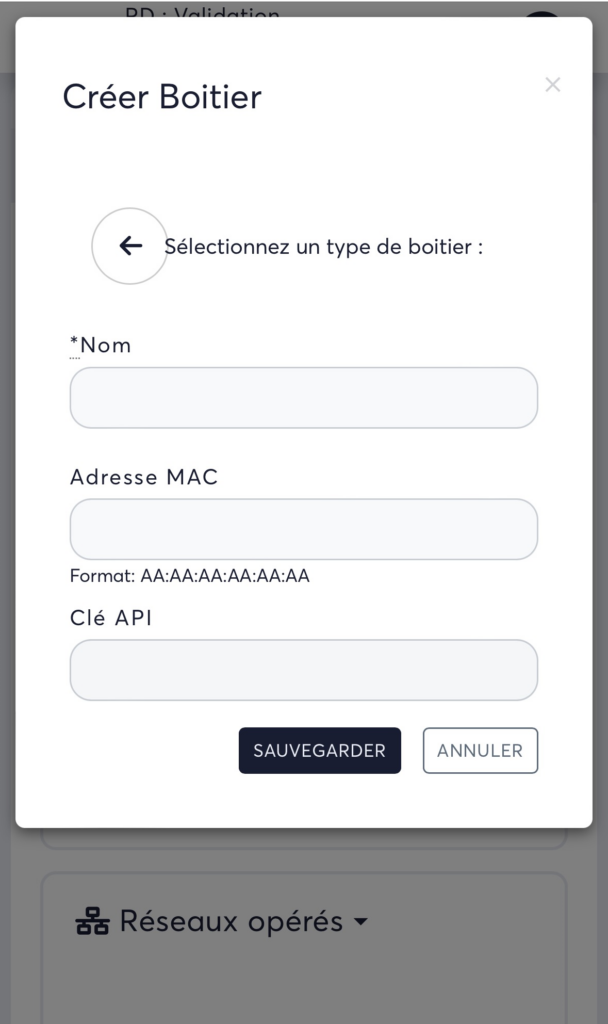
- Choose a name for your Tyvisor and enter the MAC address and API key
- In Park management, go to your Tyvisor

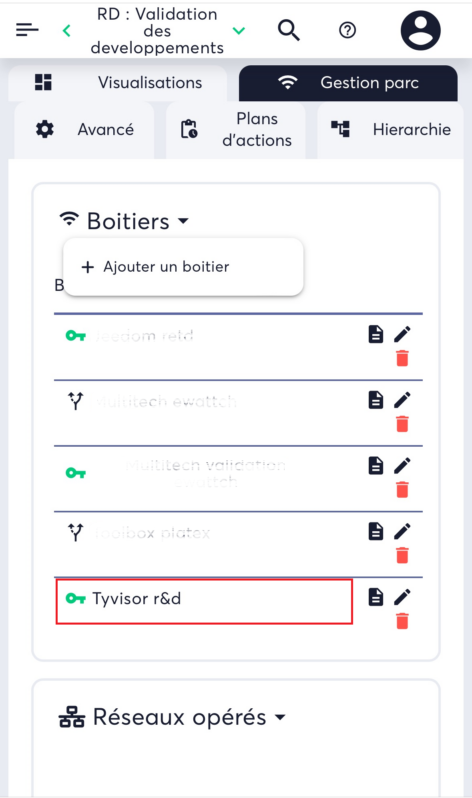
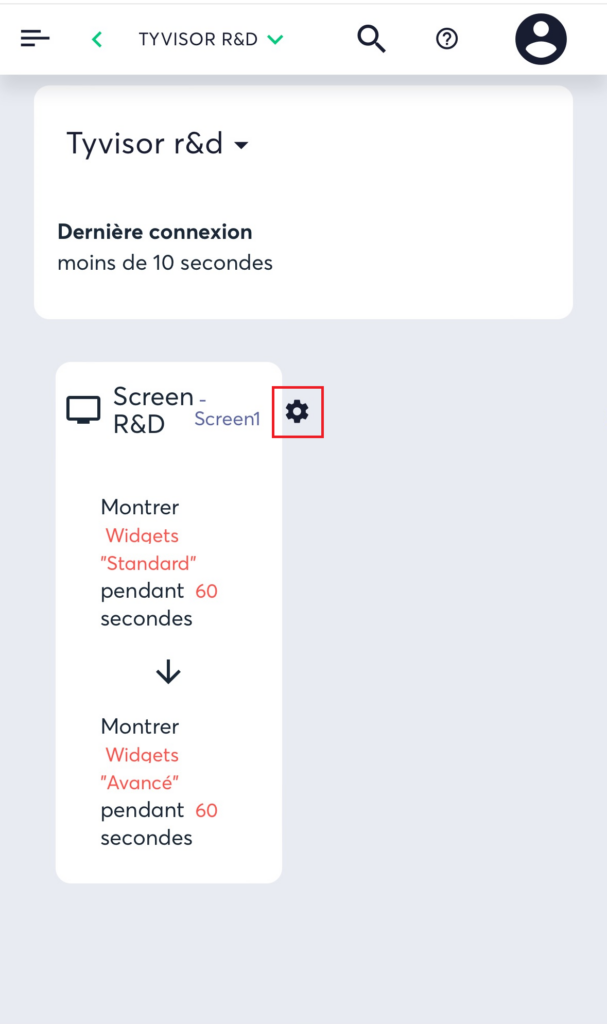
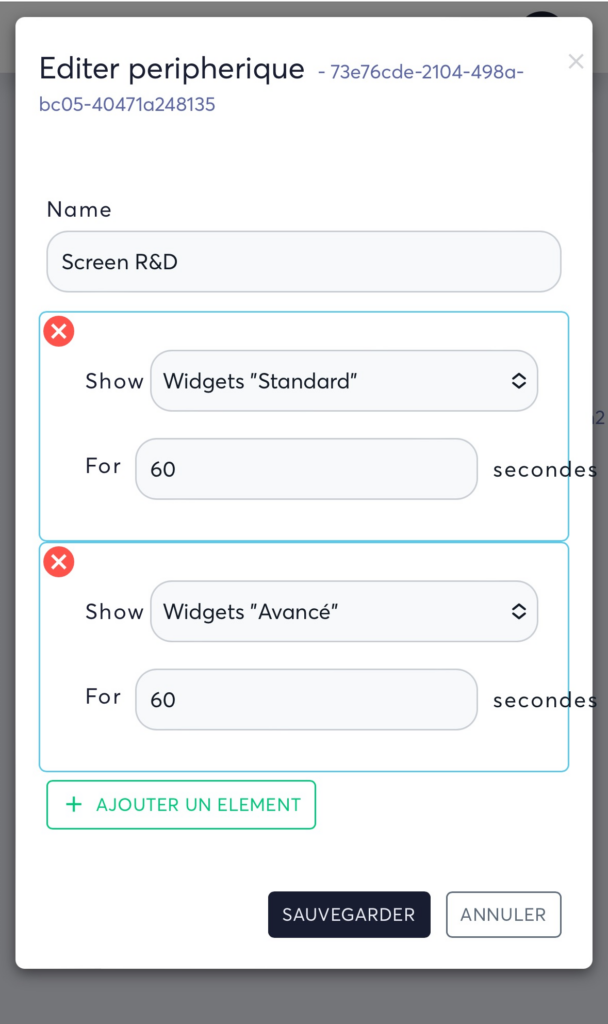
- Select the Dashboards to be displayed, as well as the display time, and save.
- Connect to the same network as your Tyvisor and enter the address http://tyvisor-xxxx.local, xxxx being the last 4 characters of the MAC address(http://tyvisor-76be.local in the example) or IP address (http://10.0.0.160 in the example).
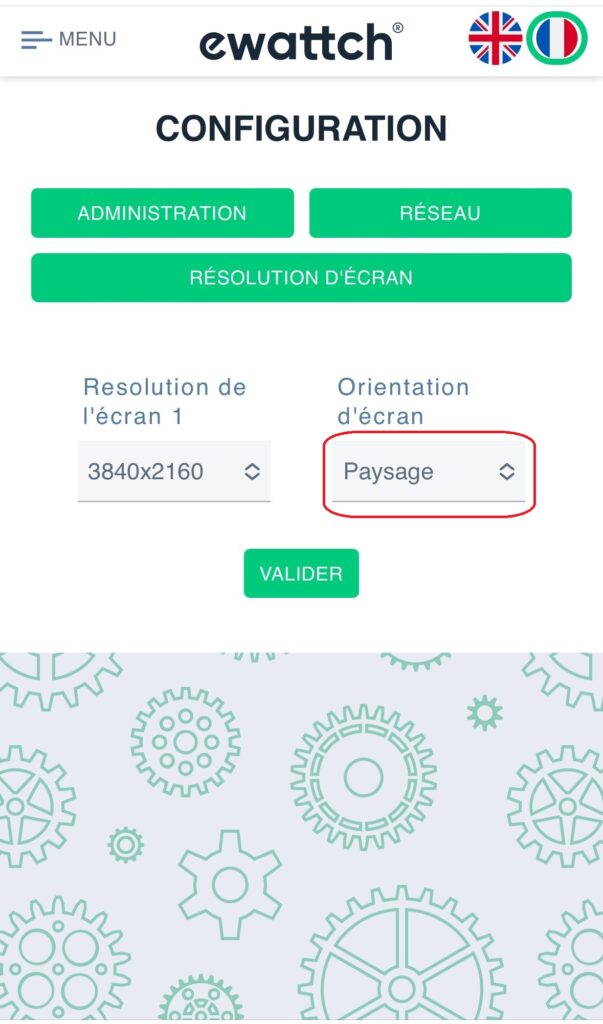
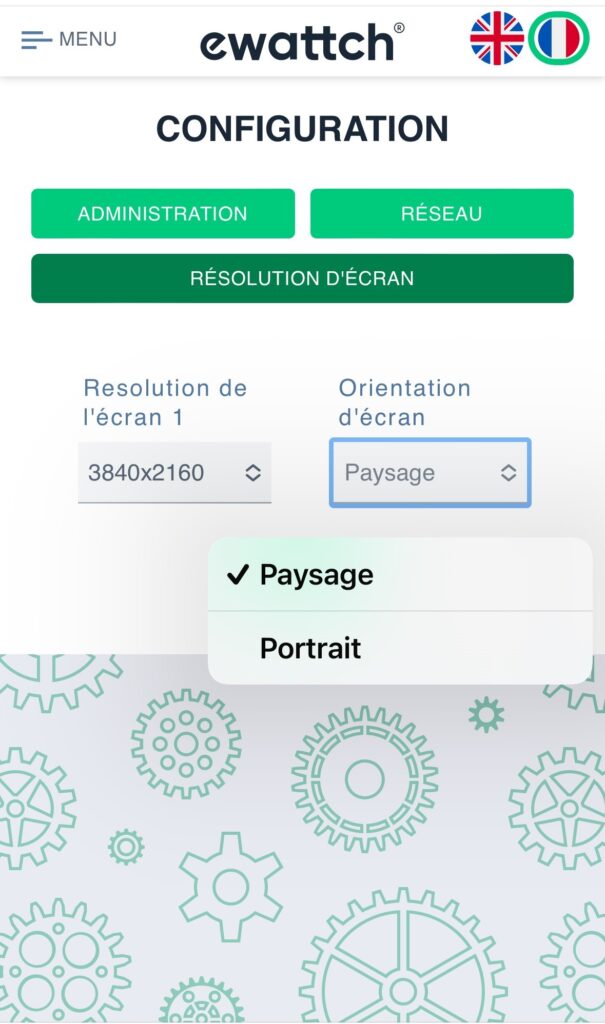
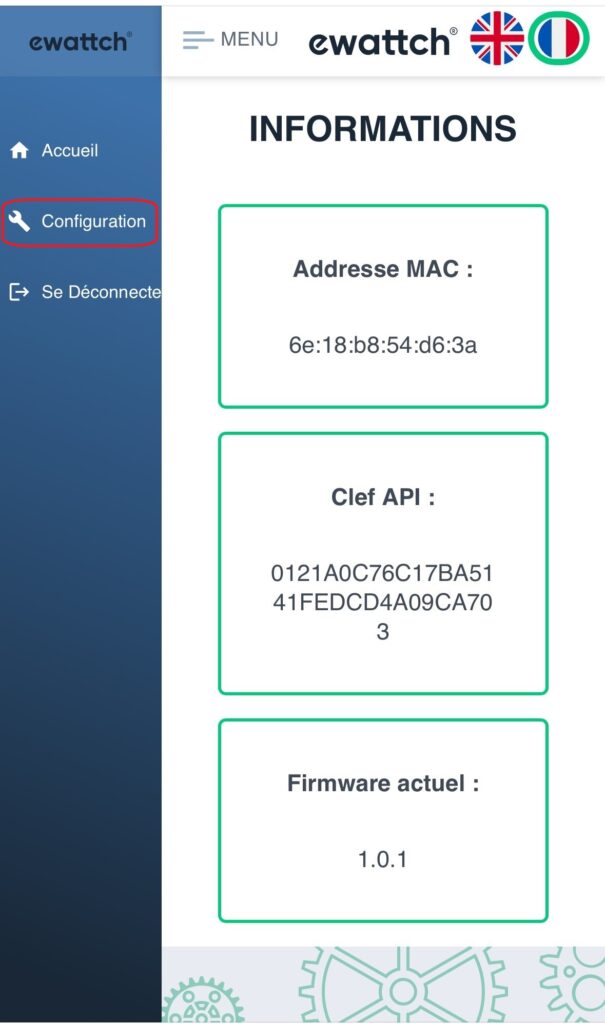
- Log in and go to Configuration then Screen Resolution

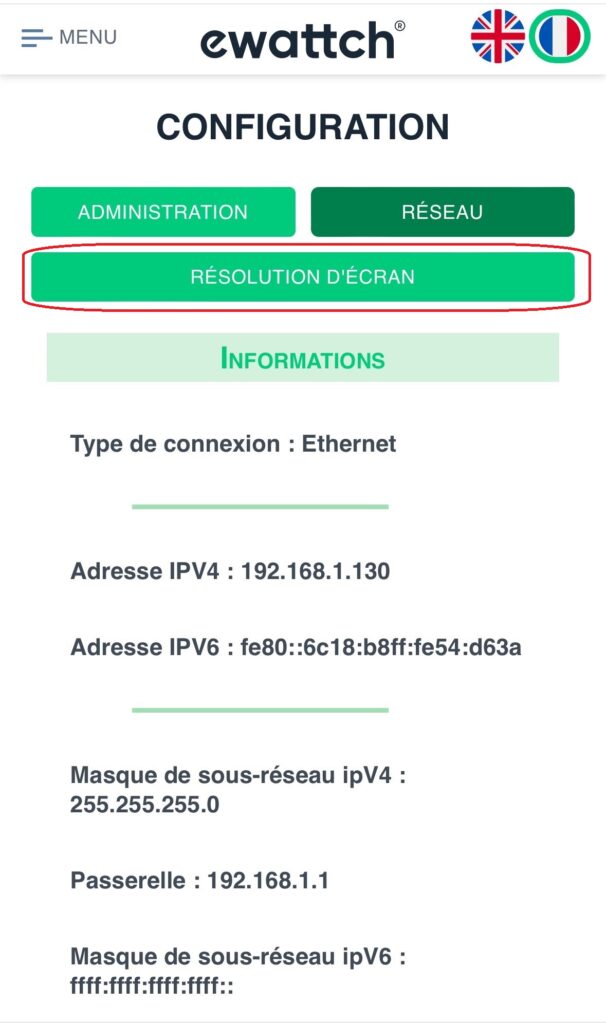
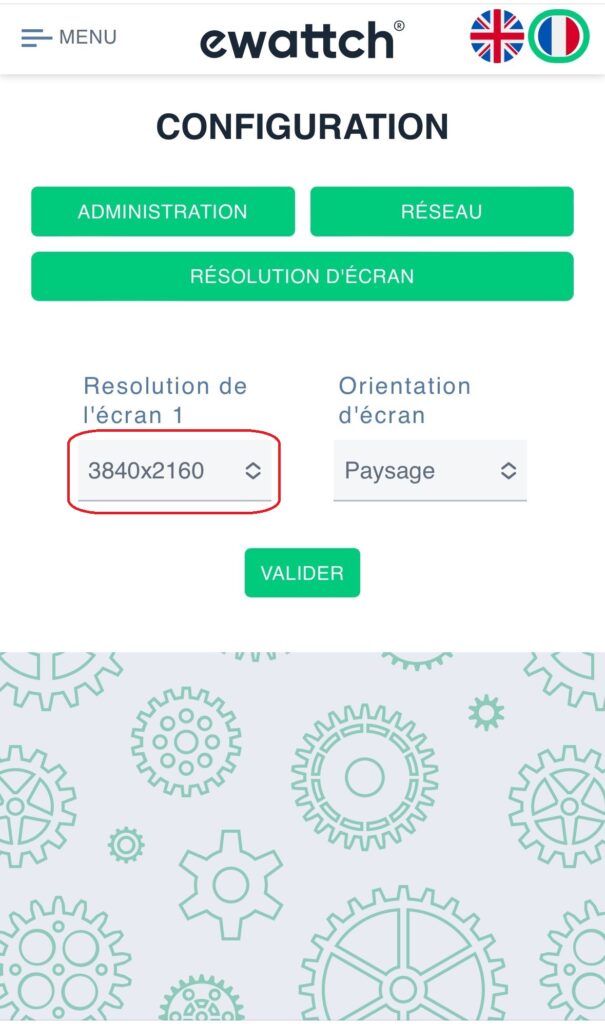
Change resolution
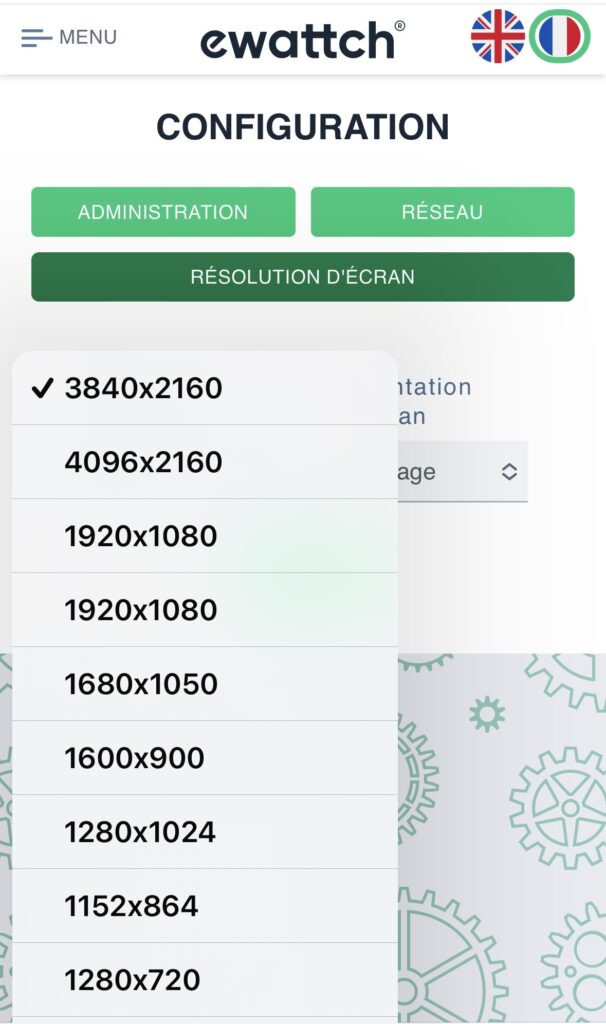
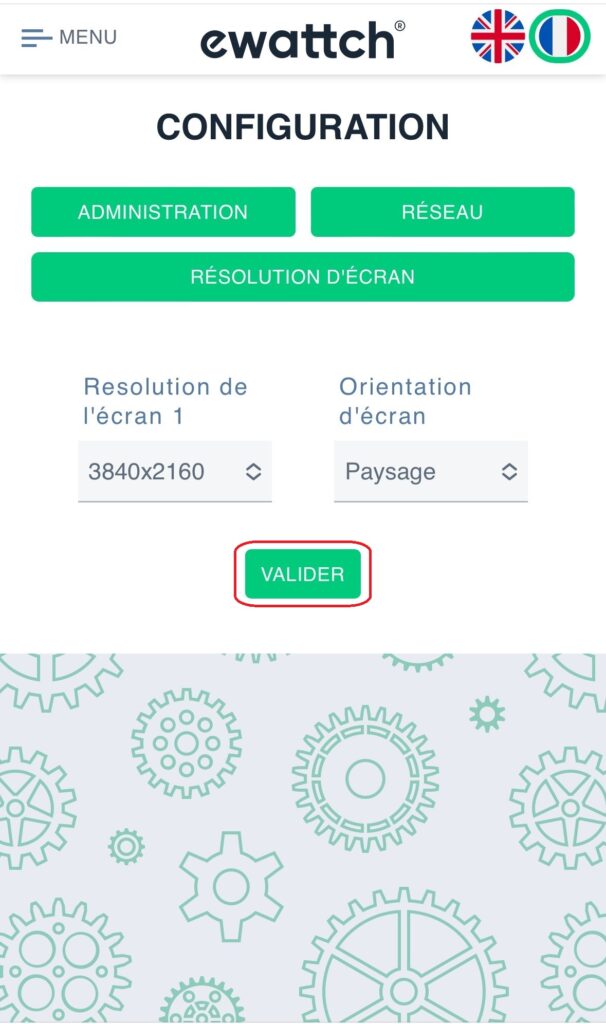
- Select the desired resolution and confirm your choice. The interface restarts (this takes a few seconds).
Change orientation
- Select the desired orientation and confirm your choice. The interface restarts (this takes a few seconds).
